 International
 Singapore
 Malaysia
 Thailand
 Vietnam
Your shopping cart is empty!
")
Getting Started with IOIO (Part 2)
- Idris Zainal Abidin
- 05 Sep 2014
- 318
First thing when we get the IOIO board, for sure we want to test it with our Android phone, at least we know that the IOIO board is working, and it should be easy step, MUST be :-). So, this tutorial will explain the steps to test your IOIO OTG board with your Android smartphone. If you are a beginner. please check out the Getting Started with IOIO (part 1).
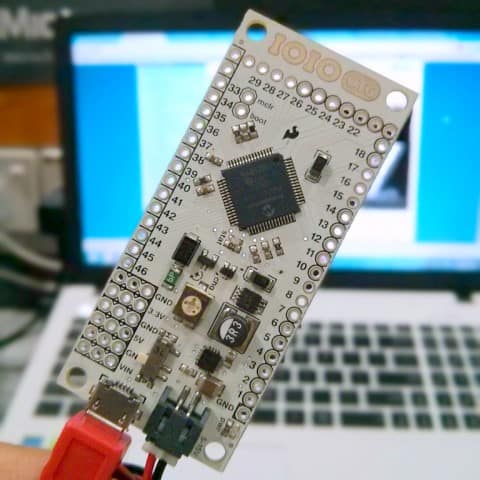
HARDWARE
1. IOIO OTG board (link).
2. Bluetooth dongle (is a must, cannot using USB cable).
3. Android smartphone.
4. 12V Adapter + other component (to power up the IOIO board).
*Please refer the picture below for the hardware setup.
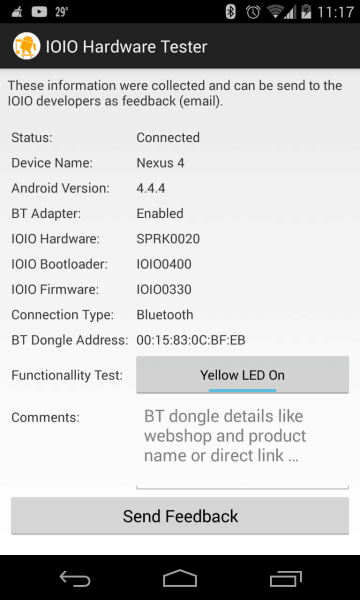
SOFTWARE
Please download IOIO Hardware Tester apps and install at your Android smartphone.
STEPS
1. Power up the IOIO board.
2. Turn ON your Android bluetooth and pair with IOIO bluetooth. Pair key is 4545.
3. Open the IOIO Hardware Tester apps. It will automatically connect to IOIO and display all the status.
4. Then you can control the IOIO LED by using the Functionality Test toggle button.
VIDEO