 International
 Singapore
 Malaysia
 Thailand
 Vietnam
Your shopping cart is empty!

Raspberry Pi: Control DC Motor using MDDS10
- Khairul_Tajudin
- 26 Jul 2016
- 1353
There are several methods to control DC motors using Raspberry Pi. The suitable method for your application depends on how many PWM outputs you have and what performance you expect out of those outputs.
There is only one hardware PWM output on the Raspberry Pi, so it difficult to control two DC Motor simultaneously. In this tutorial, we will use software PWM method to control 2 DC motors. There are some updates in RPi.GPIO of Raspberry Pi library that allow us to set any GPIO pins to become PWM pin. So in this tutorial we will demonstrate how to use PWM on any pin.
HARDWARE REQUIRED
- Raspberry Pi + 8GB SD Card (Raspbian image)
- TP-Link WiFi Dongle
- Jumper Wire
- SmartDriveDuo-10
- DC Geared Motor
- LiPo Battery
- Robot Chassis
SOFTWARE REQUIRED
1. Remote Desktop Connection
STEP BY STEP (HARDWARE)
1. In this tutorial, we will use MDDS10 as our motor driver.
2. Now, we need to setup our connection first before jump to programming session. Don’t power up Raspberry Pi or MDDS10 yet in connecting process.
| MDDS10 | Raspberry Pi |
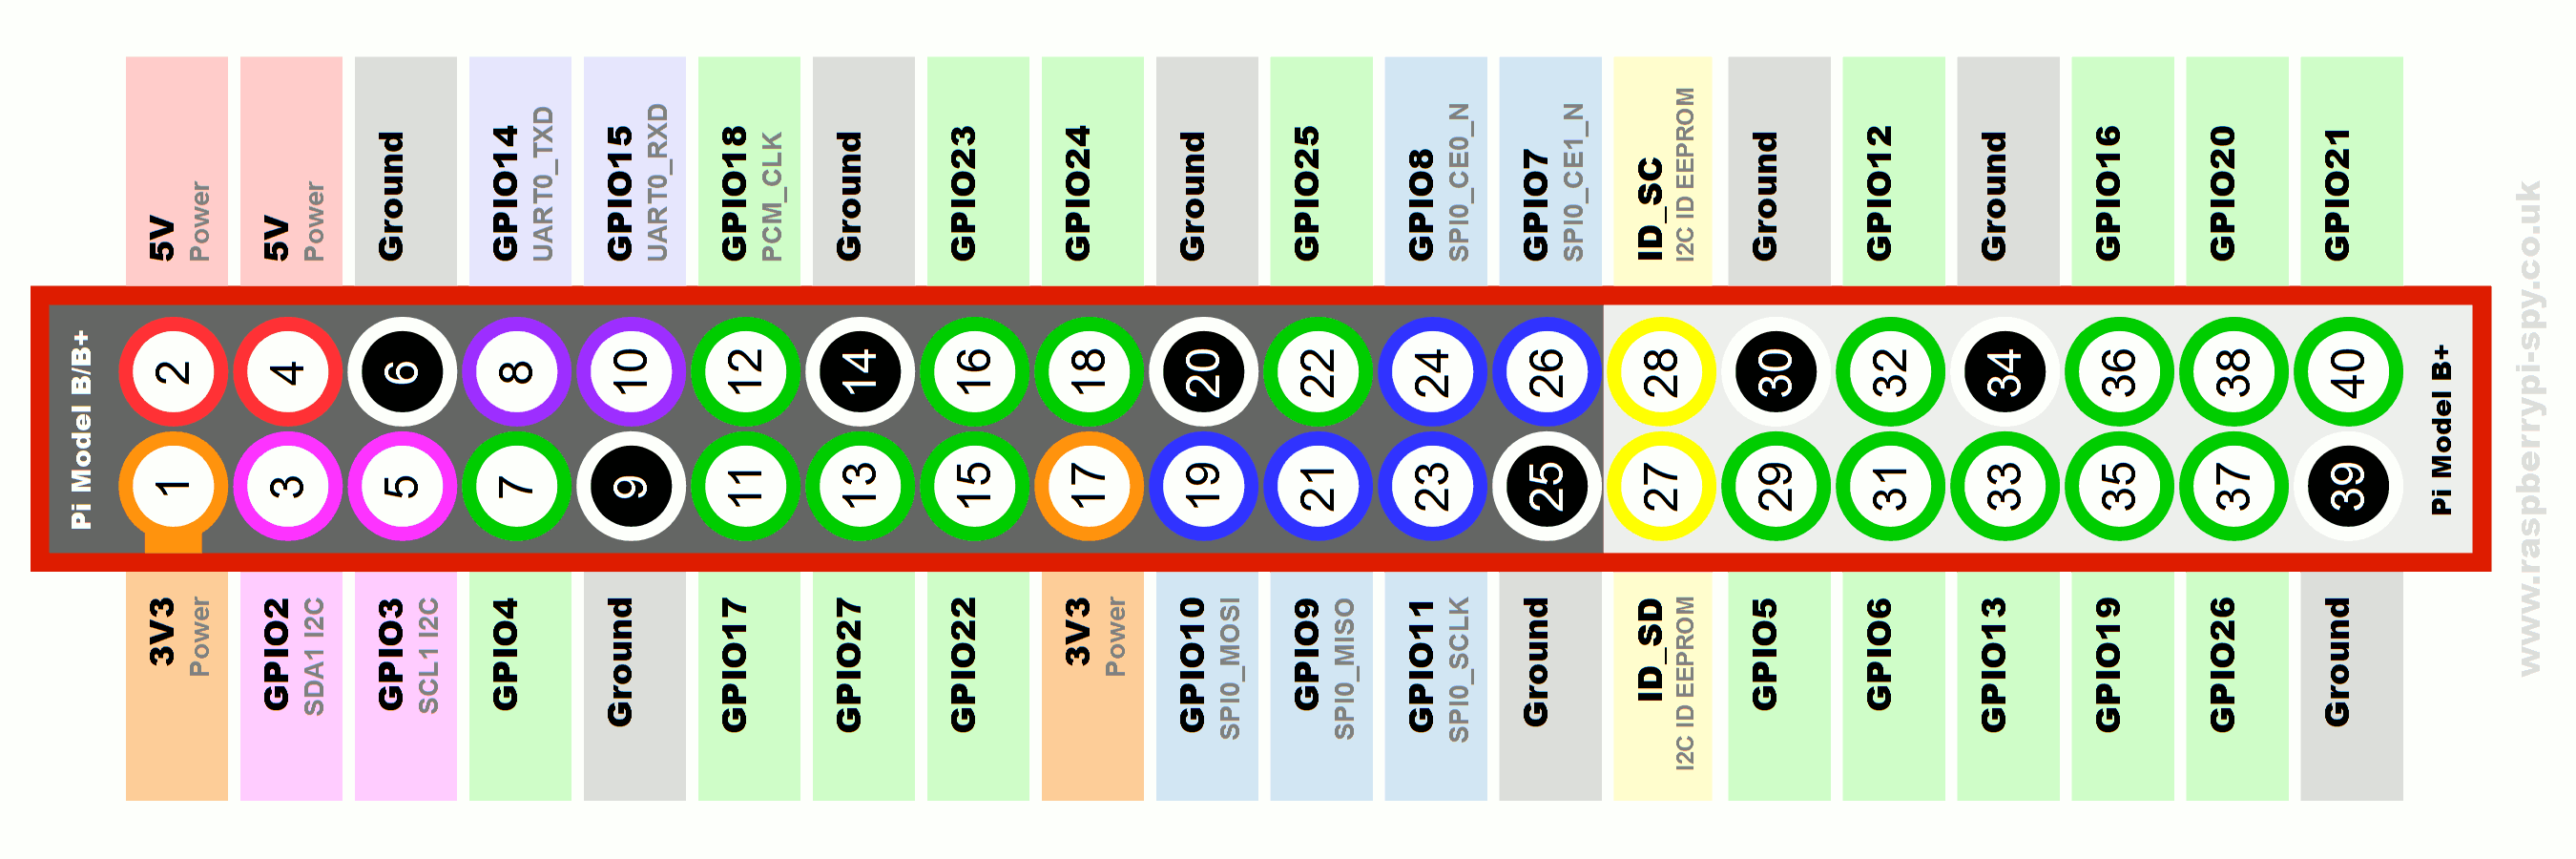
| GND | GND (pin 20) |
| 5V | 5V (pin 2) |
| AN2 | GPIO 25 (pin 22) |
| AN1 | GPIO 24 (pin 18) |
| DIG2 | GPIO 23 (pin 16) |
| DIG1 | GPIO 18 (pin 12) |
Refer to GPIO pins below to help you connecting between Raspberry Pi and MDDS10
3. Connect left motor to MLA and MLB port and right motor to MRA and MRB port.
4. In this tutorial, we will use only one battery to run Raspberry Pi and motor driver. We will take 5V from MDDS10 board to power up Raspberry Pi.
5. Connect the battery to the MDDS10. Make sure the battery is connect with correct polarity. It is important to check and double-check any wiring before adding any power source to your project.
6. To check the movement of the left motor and right motor:
Press button MLB and MRB, the motor should rotates forward.
Press button MLA and MRA, the motor should rotates backward.
If the motor move in opposite direction, just change the polarity of the wire motor on MDDS10.
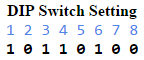
7. Make some adjustment to DIP Switch to make MDDS10 in PWM mode.

8. After you finish setting up the hardware and connections, you can start building a simple robot using these two DC Motors, MDDS10 and Raspberry Pi

STEP BY STEP (PROGRAMMING)
1. We will use Remote Desktop Connection in this tutorial to give a command to Raspberry Pi
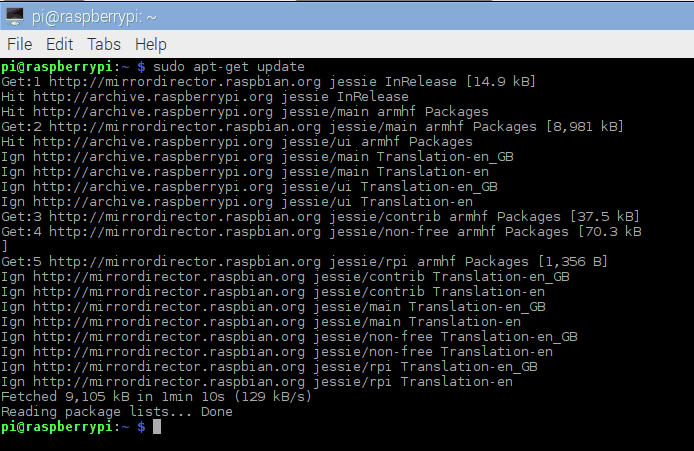
2. Now we will control two DC Motor using RPi.GPIO module. To control PWM with Python, it’s requires the RPi.GPIO 0.5.2a (or higher) library. So we need to update and upgrade our Raspberry Pi to the newer version. Open LX Terminal on your remote desktop connection. Type,
- sudo apt-get update
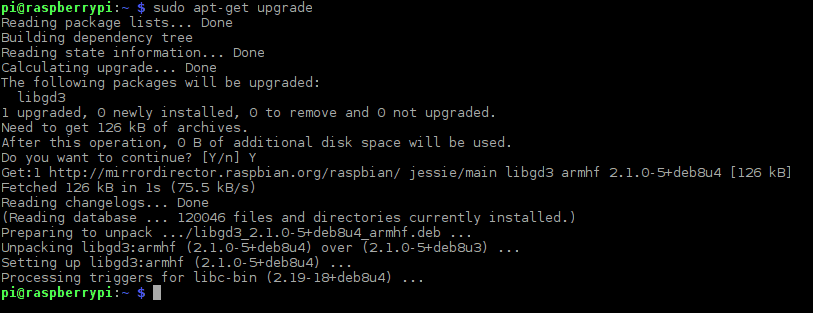
- sudo apt-get upgrade
3. Create new file to test the movement of motor.
- sudo nano MotorTest.py
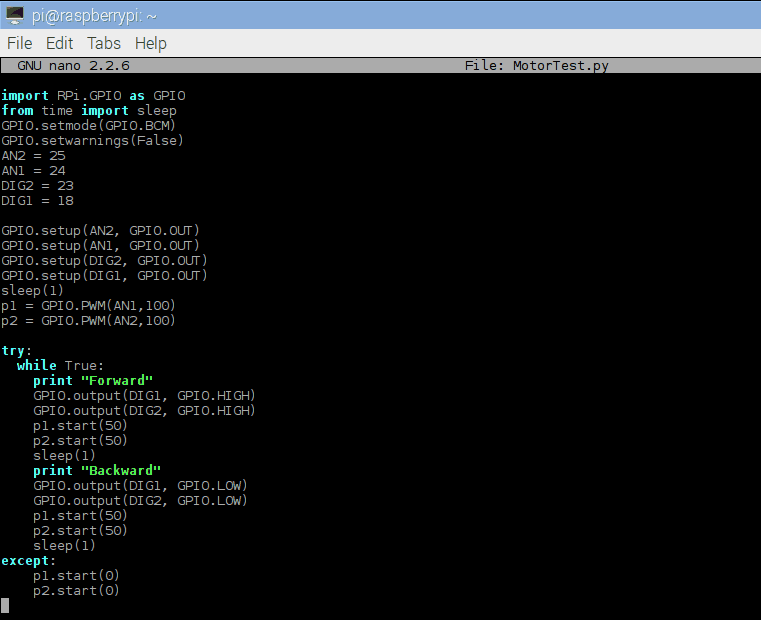
4. Setting pwm of motor by insert this following code to the file.
- import RPi.GPIO as GPIO # using RPi.GPIO module
- from time import sleep # import function sleep for delay
- GPIO.setmode(GPIO.BCM) # GPIO numbering
- GPIO.setwarnings(False) # enable warning from GPIO
- AN2 = 25 # set pwm2 pin on MDDS10 to GPIO 25
- AN1 = 24 # set pwm1 pin on MDDS10 to GPIO 24
- DIG2 = 23 # set dir2 pin on MDDS10 to GPIO 23
- DIG1 = 18 # set dir1 pin on MDDS10 to GPIO 18
- GPIO.setup(AN2, GPIO.OUT) # set pin as output
- GPIO.setup(AN1, GPIO.OUT) # set pin as output
- GPIO.setup(DIG2, GPIO.OUT) # set pin as output
- GPIO.setup(DIG1, GPIO.OUT) # set pin as output
- sleep(1) # delay for 1 seconds
- p1 = GPIO.PWM(AN1, 100) # set pwm for M1
- p2 = GPIO.PWM(AN2, 100) # set pwm for M2
5. To run the program in loop, insert:
- try:
- while True
6. For forward function, insert:
- print "Forward" # display "Forward" when program executed
- GPIO.output(DIG1, GPIO.HIGH) # set DIG1 as high, dir2 = forward
- GPIO.output(DIG2, GPIO.HIGH) # set DIG2 as high, dir1 = forward
- p1.start(50) # set speed for M1, speed=0 - 100
- p2.start(50) # set speed for M2, speed=0 - 100
- sleep(1) # delay for 1 seconds
7. For backward function, insert:
- print "Backward" # display "Backward" when program executed
- GPIO.output(DIG1, GPIO.LOW) # set DIG1 as low, DIR = backward
- GPIO.output(DIG2, GPIO.LOW) # set DIG2 as low, DIR = backward
- p1.start(50) # set speed for M1, speed=0 - 100
- p2.start(50) # set speed for M2, speed=0 - 100
- sleep(1) # delay for 1 seconds
8. To stop the movement of motor and exit from executed, insert :
- except: # exit program when keyboard interrupt
- p1.start(0) # set speed M1=0
- p2.start(0) # set speed M2=0
9. Next, combine all of the function of the code.
10. Save and exit from file. CTRL+X, type Y and ENTER. To run the code, type:
- sudo python MotorTest.py
To stop the movement of robot, press CTRL+C and the program will terminated.
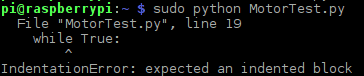
11. If you see the message above, it means you need to modify your file. Python uses indentation to define blocks and show which statements are controlled by a for or if statement. You need to indent the lines after the for, if or while. The indentation can be any consistent white space. In this tutorial we will use two spaces for indent.
12. Open the file to correct it and run the code again
13. Now you can see the robot will move forward and backward continuously until you press CTRL+C.

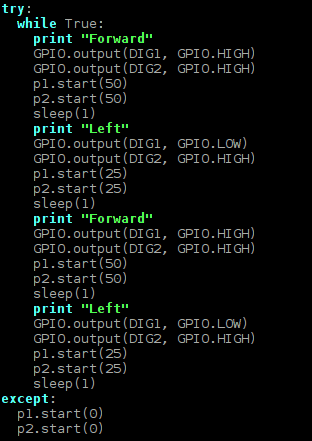
14. Next, we will proceed to program right and left movement
For left:
- print "Left" # display "Left" when program executed
- GPIO.output(DIG1, GPIO.LOW) # set DIG1 as low, dir2 = backward
- GPIO.output(DIG2, GPIO.HIGH) # set DIG2 as high, dir1 = forward
- p1.start(25) # set speed for M1
- p2.start(25) # set speed for M2
- sleep(1) # delay for 1 seconds
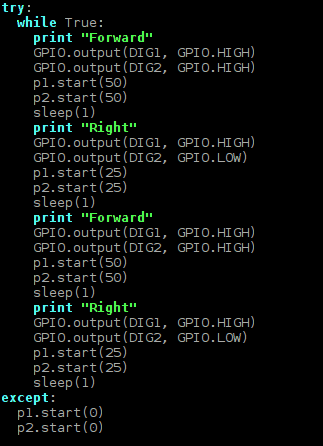
For right:
- print "Right" # display "Right" when program executed
- GPIO.output(DIG1, GPIO.HIGH) # set DIG1 as high, dir1 = forward
- GPIO.output(DIG2, GPIO.LOW) # set DIG2 as low, dir2 = backward
- p1.start(25) # set speed for M1
- p2.start(25) # set speed for M2,
- sleep(1) # delay for 1 seconds
15. Now you can try to combine and run all of the function.
Here is for left function that I combine with forward function
And here is for right function that I combine with forward function
16. You can change any value on the function above in term of delay or it speed based on your situation.
That is the end of the tutorial! If you have any question, feel free to ask in our technical forum as we seldom check the tutorial’s comment section. Thank you.
REFERENCES
Credit to:
- Controlling DC Motors Using Python with a Raspberry Pi by Jason Barnett
- Driving two DC motors with a Raspberry Pi by shallowsky
- How to use software PWM by raspi.tv